Stainless steel is only beautiful and admirable when it’s without scratches and scuffs. Stainless steel is made of chromium, an important component that makes it a little harder and prevents it from scratches.
However, scratches are inevitable. It’s true that stainless steel sink is preferable to every other product that serves the same purpose as it, not only because of its durability and resilience but also because of its pristine perfection.
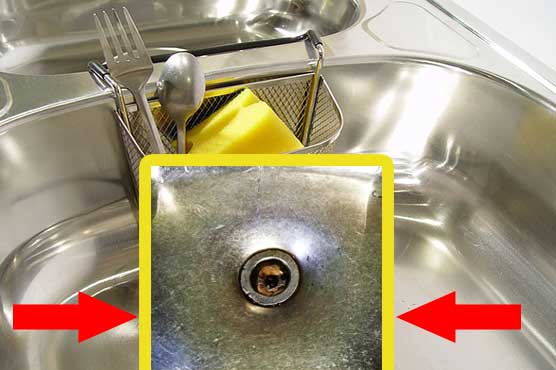
Talk about resilience, durability, and longevity, a stainless steel kitchen sink is the best choice. But, when your ever shining and bright stainless steel is scratched and dull, what do you do?
Table of Contents
Ways to remove scratches from stainless steel Sink
Removing scratches from your stainless steel sink is quite easy and simple, but it’s not magical. With simple cleaning hacks, you can get your sink glittering and looking new again. However, this process is slow and steady.
It requires a little patience. You don’t want to instantaneously remove a scratch that didn’t get there overnight, do you?
Things you need to remove scratches from your stainless steel sink
- Water(warm water)
- Small bucket
- Liquid wash/ detergent
- Clean sponge
- Soft scouring pad
- Clean clothes/ towel
- Sandpaper(1000 and 600 grit)
- Stainless sink polish
- Rubber sanding block
How to remove minor scratches from stainless steel sink
- Rinse your sink with warm water: To start this process, put a stopper in the drain, to prevent the water from escaping. Fill the sink with warm water mixed with liquid wash/detergent. Get a sponge, put in water and use to wash the edges of the sink carefully. Pay extra attention to places that allow grease and dirt.
- Remove the stopper and allow the water to drain out: After thoroughly and gently washing the sink, remove the stopper and allow the water to flow out. After this, use clean water to clear the remaining froth in the sink. Examine the sink again and see if there’s any part you left out and wash again. If there’s none, wipe the sink dry with a towel and take note of where scratches are.
- Pour a small amount of a soft liquid abrasive product on a soft scouring pad: Make sure you get a soft scouring pad that is suitable for stainless steel sink and pour a small amount of liquid abrasive product.
- Rub the scouring pad back and forth over the scratch: After you have applied the liquid abrasive product on the scouring pad, rub it back and forth over the scratch to ensure it blends with the surrounding sink area.
- Wash the sink with warm soapy water: Once all the scratches have been removed, wash the sink again with warm water, liquid detergent and wipe dry. If you are still not satisfied and want more shine and brightness, you can use stainless steel polish.
Severe Scratches
After trying the above-prescribed process, and it seems as if the scratches are not bulging, then you can try the severe scratch removal approach. The process of removing severe sink scratches is a bit different from minor scratches.
To remove severe scratches from stainless steel, employ the following methods.
- Get a small bucket filled with clean water. Get a 1000 grit sandpaper and a rubber sanding block. Dip the sanding block into the soapy water and allow the sandpaper to soak up all the water. Wet sand the scratched area. Rub back and forth with constant pressure, doing in the direction of the grain. Occasionally rewet the sanding block and check if the scratch is disappearing. If there’s still no sign of improvement, apply 600 grit sandpaper to the sanding block, repeat the process until the scratch has disappeared.
- Pour a small amount of liquid abrasive cleaning product on a soft scouring pad.
- Wash the sink down with warm water, liquid dish detergent, and a clean sponge, once all the scratches have been removed.
- Clean dry with a clean and dry towel
Additional useful tips
- Make sure the scouring pad you will use is not a hard one, as it can add more scratches to the already existing ones. Get a soft scouring pad.
- Avoid steel wool pads. They can cause your sink to rust. You don’t want to unintentionally mar your sink surface.
- You can call your sink manufacturer and ask any questions you find confusing about their product.
- For the purpose of maintenance, always check out for grimes and grease on your sink and wash thoroughly.
- Use your sink appropriately. Don’t just dump every other thing there, this can cause the surface to become scuffed.
Because stainless steel sink bears the brunt of the cooking we do every other day. From bearing the weight of the hot pot bottom and the kitchen utensil, scratches are inevitable but can be gotten rid of Carefully following these cleaning tips and see your stainless steel sinks shine and sparkle as ever.